40 Valentine’s Day Activities for Kids: Crafts, Games, and STEM Fun

 Discover a Free Education Video App for Kids
Pastory uses AI to personalize educational video content based on your child’s interests and personality. Safe, engaging, and built for curious young minds. Sign up now to stay updated and enjoy early access with a free trial
Holiday-themed activities can support children’s creativity, emotional expression, communication, problem-solving, and fine motor development. This guide features 40 Valentine’s Day activities for the home, classroom, and community settings. The ideas include arts and crafts, active games, collaborative projects, and introductory STEM experiments for a range of ages. Each activity lists the required materials and instructions, while the guide also highlights quick options, age recommendations, and key adult-supervision points.
Key Takeaways
- Developmental Benefits: Age-appropriate crafts can support hand strength, bilateral coordination, creativity, and fine motor control.
- Scalable Complexity: Many activities include optional extensions or can be simplified for different age groups.
- Low-Prep Options: Several activities take less than 10 minutes to set up and use common materials such as crayons, construction paper, and contact paper.
- Inclusive Design: Several games use collaborative or non-elimination formats that encourage participation, communication, and turn-taking.
Best Picks by Age
Choosing an age-appropriate activity can help children stay engaged and reduce frustration. Below are several recommended activities organized by age group:
- Toddlers (Ages 2-3): Choose simple sensory and fine motor activities with large materials and close adult supervision. Recommended options include the Heart Tracing Activity and Textured Heart Painting.
- Preschoolers (Ages 3-5): Focus on simple tool use, short instructions, and cooperative play. Recommended options include Pom-Pom Love Bugs and Cupid Says.
- Early Elementary (Ages 6-8): Introduce multi-step projects, basic logic, and more independent work. Recommended options include the Woven Heart Basket and Floating Dry-Erase Hearts Experiment.
- Older Children (Ages 9+): Offer more complex construction challenges and opportunities for artistic experimentation. Recommended options include Melted Crayon Wax Hearts, with an adult handling the iron, and the Heart Building Challenge.
Fast Options for Busy Days
When time or materials are limited, low-prep holiday activities can keep children engaged without extensive setup. The following six options can be prepared in less than 10 minutes:
- Spot Hearts Scavenger Hunt: Hide 10 to 20 pre-cut paper hearts around one room for a quick movement activity.
- Cupid Says: Play a festive variation of Simon Says with no materials required.
- Simple Heart Card: Set out construction paper, safety scissors, and crayons or markers for a quick folding and decorating activity.
- Heart Tracing Activity: Use cardboard heart templates to practice tracing and pencil control.
- Find the Letter on the Heart: Prepare paper hearts and dot stickers for a quick letter-recognition activity.
- Musical Hearts: Place pre-cut paper hearts on the floor and prepare a short list of simple prompts for a movement game.
Materials, Mess, and Supervision
A successful craft session depends on choosing age-appropriate materials, planning for cleanup, and identifying any safety risks in advance. Most of these projects use affordable everyday supplies such as construction paper, washable paint, non-toxic school glue, cardboard tubes, and pantry staples.
When choosing an activity, consider the available space, cleanup time, and level of adult assistance required. Low-mess options use materials such as dot stickers, contact paper, and painter’s tape, which can minimize cleanup. Projects involving liquid paint, air-dry clay, or water may require more cleanup, so use a washable table covering or a shallow tray.
Adult supervision is essential for activities involving heat, sharp tools, or small parts such as pom-poms, googly eyes, beads, toothpicks, and marshmallows. Keep these materials out of reach of children who may put objects in their mouths. Adults should handle irons, ovens, paring knives, utility knives, wire cutters, and other sharp or heated tools.
Easy Valentine’s Day Activities for Kids
| Activity Name | Target Age | Prep Time | Mess Level | Key Materials |
| 1. Mystery Message Hearts | Ages 4-8 | 5 minutes | Low | White crayon and watercolor |
| 2. Heart Tracing Activity | Ages 2-5 | 2 minutes | Very low | Cardboard templates, paper, and markers |
| 3. Mittens and Hearts Matching Game | Ages 3-6 | 10 minutes | Very low | Cardstock cards and markers |
| 4. Find the Letter on the Heart | Ages 3-5 | 5 minutes | Very low | Construction paper and dot stickers |
| 5. Family Valentine Poster | All ages, with adult assistance as needed | 5 minutes | Medium | Poster board, markers, and photos |
1. Mystery Message Hearts
Mystery Message Hearts combine a simple wax-resist art technique with writing and drawing practice. Children write hidden words or draw shapes with a white wax crayon, then reveal them by painting over the paper with watercolor.
Materials: Heavy white cardstock, white wax crayons, watercolor paints, paintbrushes, and a cup of water.
Step-by-Step Instructions:
- Cut a heart shape from the white cardstock.
- Press firmly as you write a hidden word, letter, or positive message with the white crayon.
- Ask the child to paint over the surface with diluted watercolor paint.
- Watch the message appear as the wax resists the watercolor.
Extension: Older children can create a series of coded clues for a treasure hunt around the house.
2. Heart Tracing Activity
The Heart Tracing Activity develops pre-writing skills by helping children guide a crayon or marker around the edge of a template. This fine motor activity supports spatial awareness, hand control, and pencil control.
Materials: Cardboard heart templates in several sizes, colored markers or crayons, painter’s tape, and drawing paper.
Step-by-Step Instructions:
- Secure a sheet of drawing paper to the table with painter’s tape.
- Place a thick cardboard heart template in the center of the paper.
- Show the child how to hold the template steady with one hand while tracing around the edge with the other.
- Repeat the process with templates of different sizes to create nested or overlapping colorful hearts.
Extension: Ask the child to decorate the spaces between the traced hearts with dots, lines, or repeating color patterns.
3. Mittens and Hearts Matching Game
The Mittens and Hearts Matching Game is a simple memory activity that can reinforce shape recognition, early math, or reading skills.
Materials: 20 identical cardstock rectangles, markers, and scissors.
Step-by-Step Instructions:
- Create 10 matching pairs of mitten or heart pictures on the cardstock cards.
- Write matching content on the two cards in each pair, such as the same number, rhyming words, or corresponding uppercase and lowercase letters.
- Shuffle the completed cards and place them face down in a grid.
- Let children turn over two cards per turn and try to collect matching pairs.
Extension: Place a simple addition problem, such as 2 + 3, on one card and its answer, 5, on the matching card.
4. Find the Letter on the Heart
Find the Letter on the Heart is a letter-recognition activity that asks children to find a target letter among several others.
Materials: Five large construction-paper hearts, a black marker, and large colorful dot stickers.
Step-by-Step Instructions:
- Write the target letter at the top of each paper heart as a reference.
- Write several copies of the target letter among a mix of other letters across each heart.
- Give the child a sheet of colorful dot stickers.
- Ask the child to find and cover only the target letters.
Extension: For older children, hide a target sight word among other words or ask them to find pictures whose names begin with a specific sound.
5. Family Valentine Poster
The Family Valentine Poster is a collaborative project that encourages family members to express appreciation for one another.
Materials: One large sheet of poster board, markers, heart stickers, glue sticks, and family photos.
Step-by-Step Instructions:
- Attach family photographs to the center of the poster board.
- Draw large empty heart outlines around the photographs.
- Invite each family member to write a specific note of appreciation or a positive quality inside an empty heart.
- Decorate the remaining empty space together with heart stamps, stickers, or drawings.
Extension: Hang the finished poster in a shared area of the home as a daily reminder of what family members appreciate about one another.
Valentine’s Day Crafts for Kids
6. Paper Heart Garland
The Paper Heart Garland develops scissor and paper-construction skills as children turn flat paper strips into a three-dimensional chain.
Materials: Multicolored construction paper, safety scissors, and a school stapler or glue stick.
Step-by-Step Instructions:
- Cut construction paper into uniform strips measuring 1 inch wide by 8 inches long.
- Fold one strip in half and crease the center.
- Bring the two open ends together above the crease to form a heart, then staple or glue them together.
- Thread the next strip through the first heart, fold it in half, shape it into another heart, and secure the ends.
- Continue until the garland reaches the desired length.
Extension: Use pages from old magazines or unwanted, damaged books to create a textured, vintage-style garland.
7. Textured Heart Painting
Textured Heart Painting lets children explore how everyday objects create different printed patterns.
Materials: Heavy paper, washable tempera paint, bubble wrap, dish sponges, plastic forks, shallow paper plates, and a large piece of cardboard.
Step-by-Step Instructions:
- Cut a heart-shaped opening in a large piece of cardboard to create a stencil. An adult should prepare the stencil for younger children.
- Pour small amounts of different paint colors onto separate shallow plates.
- Ask the child to press bubble wrap, a sponge, or a fork into the paint, then stamp it inside the stencil area.
- Lift away the cardboard stencil to reveal a heart filled with different printed textures and patterns.
Extension: Ask the child to compare the patterns and describe how the shape of each tool affects the print it makes.
8. Watercolor Heart Surprise
This art technique builds on basic wax-resist properties, allowing children to create high-contrast designs in which white patterns appear against a colorful watercolor background.
Materials: Heavy mixed-media paper, a white wax crayon, liquid watercolors, and a soft brush.
Step-by-Step Instructions:
- Press firmly as you draw a geometric pattern or write a secret riddle with the white crayon.
- Choose one or more bright watercolor colors and prepare them according to the package directions.
- Brush the watercolor across the paper in broad, even strokes.
- Use a dry cloth to gently blot excess paint from the wax lines if needed.
Extension: Challenge older children to use cross-hatching, dots, or geometric lines to create more detailed patterns.
9. Heart-Shaped Ladybug Stamps
This activity shows how simple geometric shapes can be combined to create a recognizable insect while building spatial awareness.
Materials: A large raw potato or thick household sponge, red and black washable tempera paint, black markers, paper, and a knife or scissors for adult use only.
Step-by-Step Instructions:
- Have an adult cut the potato or thick sponge into a heart shape.
- Let the child dip the stamp into red paint and press it onto the paper with the point facing down.
- Allow the red paint to dry.
- Add a small black head above the rounded top, then draw a center line and spots on the red body.
- Add antennae with a fine-tip marker.
Extension: Talk about real ladybugs, then count the spots or combine the spots on two pictures to practice simple addition.
10. Paper Tube Garland
The Paper Tube Garland is a reusable-material craft that develops bilateral coordination through painting, cutting, shaping, and threading.
Materials: Clean cardboard tubes, washable red paint, a paintbrush, safety scissors, and twine or yarn.
Step-by-Step Instructions:
- Paint the outside of the cardboard tubes red and let them dry.
- Press each tube flat, then push one creased edge inward along the length of the tube to create a heart-shaped profile.
- Cut the shaped tube into rings approximately 1/2 inch wide.
- Thread the heart-shaped rings onto a length of twine, spacing them evenly.
- Tie small knots between the rings if needed to keep them in place.
Extension: Have children write one letter on each ring to spell out a welcome message for a Valentine’s Day event.
11. Yarn Heart Craft
The Yarn Heart Craft develops hand control and concentration through repeated wrapping movements.
Materials: Rigid corrugated cardboard, scissors, colorful yarn, and tape.
Step-by-Step Instructions:
- Cut a sturdy heart shape from thick corrugated cardboard. An adult should prepare the base for younger children.
- Secure the starting end of a long strand of yarn to the back of the cardboard with tape.
- Wrap the yarn around the cardboard heart in different directions until the surface and edges are covered.
- Tuck the end under several wrapped strands and secure it with a knot or a small piece of tape on the back.
Extension: An adult can punch large holes around the edge of another cardboard heart so children can practice simple sewing movements with a blunt plastic needle.
12. Pom-Pom Love Bugs
Creating Pom-Pom Love Bugs encourages imaginative play and gives children practice positioning and gluing small craft materials.
Materials: Large pom-poms, pre-cut foam hearts, large googly eyes, chenille pipe cleaners, and non-toxic craft glue.
Step-by-Step Instructions:
- Glue a large pom-pom to the center of a pre-cut foam heart, which will serve as the creature’s base.
- Bend a short piece of pipe cleaner into a V shape and glue the center to the top of the pom-pom to create two antennae.
- Attach two googly eyes to the front of the pom-pom with small dots of glue.
- Let the love bug dry completely before using it for imaginative play.
Extension: Ask children to write a short character biography or story about their love bug.
Safety Note: This activity contains small parts and is not suitable for children who may put objects in their mouths.
13. Air-Dry Clay Heart Pinch Pots
This sculpting activity shows children how soft clay can be shaped into a small decorative trinket dish.
Materials: White air-dry modeling clay, child-safe sculpting tools, non-toxic water-based paint, and an optional non-toxic sealer.
Step-by-Step Instructions:
- Roll a piece of air-dry clay into a smooth ball about the size of a golf ball.
- Press a thumb into the center and pinch the walls upward to create a small bowl.
- Gently pinch one side of the bowl outward to form the point of the heart, then press a small indentation into the opposite side of the rim.
- Allow the clay to dry according to the manufacturer’s instructions, typically for at least 24 to 48 hours.
- Paint the pot only after it is completely dry.
Extension: Press lace, leaves, or other textured materials into the wet clay to create relief patterns.
Safety Note: Use the finished pot only for non-food items unless the clay manufacturer explicitly states that the product is food-safe.
14. Melted Crayon Wax Hearts
This adult-assisted art project shows how crayon wax softens and melts when heated, creating translucent designs that resemble stained glass.
Materials: Wax crayon shavings, wax paper, an iron, a kitchen towel, a cardboard heart template, and scissors.
Step-by-Step Instructions:
- Place a sheet of wax paper on the work surface and spread a thin, even layer of crayon shavings over it.
- Cover the shavings with a second sheet of wax paper, then place a kitchen towel over the entire project.
- An adult should set the iron to a low, no-steam setting and press it briefly over the towel, checking the wax every few seconds.
- Keep children away from the hot iron and work in a well-ventilated area.
- Once the wax has cooled and hardened, trace and cut out heart shapes with the cardboard template.
Extension: Hold the finished hearts against a window to observe how light passes through different thicknesses of wax.
15. Washi Tape Heart Suncatcher
The Washi Tape Heart Suncatcher is a low-mess alternative to painting that lets children explore patterns, overlapping shapes, and translucent color.
Materials: Clear contact paper, colorful translucent washi tape, dark construction paper, and scissors.
Step-by-Step Instructions:
- Cut a large heart shape from dark construction paper, then remove the center to leave a border about 1/2 inch wide.
- Place the dark paper border on the sticky side of a sheet of clear contact paper.
- Tear strips of washi tape and place them across the open center, overlapping the pieces to create patterns.
- Seal the back with a second sheet of contact paper.
- Trim around the outer edge and mount the finished suncatcher on a sunny window.
Extension: Use translucent tape in primary colors and overlap the strips to observe the new colors created where they intersect.
DIY Valentine’s Day Cards and Gifts
16. Simple Heart Card
Making a Simple Heart Card helps children practice folding paper along a central axis and introduces the idea of symmetry.
Materials: Heavy construction paper, safety scissors, markers, and heart stickers.
Step-by-Step Instructions:
- Fold a sheet of heavy construction paper in half to create the card base.
- Draw half of a heart along the folded edge.
- Cut carefully along the drawn line while keeping the paper folded and the central fold intact.
- Open the folded paper to reveal a symmetrical heart-shaped card.
- Add a personal message and decorations inside.
Extension: Add a simple pop-up tab inside the card and attach a smaller paper heart to it.
17. Mystery Message Valentine Card
This card combines art with a thoughtful writing activity and gives children a playful way to share hidden messages with friends and family.
Materials: Cardstock card bases, white wax crayons, watercolor paints, fine-tip black pens, a small watercolor brush, and decorative tape.
Step-by-Step Instructions:
- Write a hidden greeting, such as “You are special!”, inside the card with a white wax crayon.
- Add a short note telling the recipient to paint over the blank area.
- Attach a small watercolor brush to the front of the card with decorative tape.
- Explain in the note that the recipient will need watercolor paint and a small amount of water to reveal the message.
- Give the card to a friend or family member.
Extension: Encourage older children to use a simple number or symbol cipher for the hidden message.
18. Salt Dough Love Bug Card
This craft combines salt-dough modeling with card making to create a three-dimensional keepsake.
Materials: 2 cups all-purpose flour, 1 cup table salt, up to 1 cup water, non-toxic water-based paint, heavy cardstock, and strong tacky glue.
Step-by-Step Instructions:
- Mix the flour and salt, then add the water gradually until a smooth, firm dough forms.
- Shape the dough into small, flat love bug figures.
- Have an adult bake the figures at 250 degrees F (120 degrees C), beginning to check them after about 2 hours. Thicker pieces may need additional time.
- Let the pieces cool completely, then paint them and allow the paint to dry.
- Attach a small, lightweight figure to heavy folded cardstock with strong tacky glue.
- Leave the card lying flat until the glue has fully dried.
Extension: Before baking the shape, make a small hole near the top with a drinking straw. Once the piece has baked, cooled, and dried completely, thread ribbon through the hole to create a hanging ornament.
Safety Note: Salt dough is not edible. Keep it away from pets because its high salt content can be harmful if swallowed.
19. Cardboard Heart Stamp Card
Stamping with recycled materials helps children practice patterns and repetition while showing how one simple shape can create a decorative border.
Materials: Clean cardboard tubes, washable tempera paint, cardstock, markers, tape, and a shallow paint palette.
Step-by-Step Instructions:
- Press one side of a tube’s rim inward to form the top indentation of a heart.
- Pinch the opposite side into a point and secure the shape with tape.
- Press the shaped end into a shallow dish of tempera paint.
- Stamp the heart repeatedly on the front of a cardstock card to create a border or pattern.
- Write a personal message inside the card.
Extension: Place two primary paint colors next to each other on a shallow palette and dip the stamp into both to observe how the colors blend.
20. Stuffed Heart Valentine
The Stuffed Heart Valentine introduces basic sewing and assembly skills while encouraging careful alignment and patient hand movements.
Materials: Colorful felt sheets, blunt plastic yarn needles, yarn, cotton stuffing or shredded paper, scissors, and an awl or leather punch for adult use only.
Step-by-Step Instructions:
- Cut two identical large heart shapes from felt. An adult should help with cutting as needed.
- Have an adult prepare evenly spaced holes around the edges, or use pre-punched felt shapes designed for sewing crafts.
- Thread a blunt plastic needle with yarn and show the child how to use a simple running stitch to join the edges.
- Leave a small opening and fill the heart with cotton stuffing or shredded paper.
- Stitch the remaining gap closed.
Extension: Add a loop of ribbon before closing the final gap so the finished heart can be hung as a decoration.
21. Lollipop Flower Valentine
This project combines a small treat or pencil with a paper craft and gives children practice cutting matching shapes and assembling a layered design.
Materials: Colored construction paper, festive pencils or individually wrapped lollipops, safety scissors, and a hole punch.
Step-by-Step Instructions:
- Cut three matching heart shapes from construction paper to use as petals.
- Punch one hole near the pointed end of each heart.
- Stack the hearts and slide the pencil or lollipop stick through the aligned holes.
- Fan the hearts into a flower shape around the center.
Extension: Write one reason you appreciate the recipient on each paper petal.
Safety Note: Check school policies and food allergies before using candy. Do not use lollipops with very young children.
22. Woven Heart Basket
This traditional woven-paper heart craft introduces elementary-age children to repeating patterns and basic paper weaving.
Materials: Two contrasting colors of heavy paper, scissors, and a glue stick for the optional handle.
Step-by-Step Instructions:
- Cut two paper strips measuring approximately 3 by 9 inches, then fold each strip in half crosswise.
- Round the open ends of each folded strip.
- Starting at the folded edge, cut two or three parallel slits toward the rounded end, stopping before the curve so the loops remain connected.
- Hold the two folded pieces at right angles.
- Weave each loop alternately through and around the loops of the other piece, keeping the center open to form a pocket.
- Add a simple paper handle with glue if desired.
Extension: Fill the basket with short notes, affirmations, or paper hearts.
23. Mini Canvas Keepsake
The Mini Canvas Keepsake uses a child’s thumbprints to capture a moment in time and create a personal gift for a parent, grandparent, or caregiver.
Materials: Mini 3-by-3-inch canvases, washable non-toxic ink pads, fine-tip paint pens, and an optional miniature easel.
Step-by-Step Instructions:
- Press the child’s thumb gently onto a pink or red ink pad.
- Press the inked thumb onto the canvas at a slight angle.
- Make a second overlapping print at the opposite angle to form a heart.
- Use a fine-tip paint pen to add the child’s name and the year along the bottom edge.
- Let the ink and paint dry completely.
- If desired, place the finished canvas on a miniature wooden easel.
Extension: Display several canvases from siblings or classmates together as a coordinated art collection.
Valentine’s Day Decorations Kids Can Make
24. Hanger Heart Wreath
The Hanger Heart Wreath lets children practice tying fabric strips onto an adult-prepared wire frame.
Materials: An adult-prepared wire coat hanger or heart-shaped wreath frame, fabric scraps cut into 6-inch strips, strong tape, and safety scissors.
Step-by-Step Instructions:
- An adult should bend the hanger into a heart shape.
- Secure any sharp or protruding ends with strong tape and position the hook at the top.
- Tie a fabric strip around the wire frame with a double knot.
- Continue tying strips and slide them close together until the wire is covered.
- Trim loose threads with safety scissors as needed.
Extension: Arrange the strips by color to create a repeating pattern or gradient around the frame.
25. Tissue Paper Stained Glass
This classic window craft recreates the glowing appearance of stained glass and lets children observe how translucent colors change when they overlap.
Materials: Translucent tissue paper cut into squares, clear contact paper, dark construction paper, and scissors.
Step-by-Step Instructions:
- Cut a large heart shape from dark construction paper, then remove the center to create a border.
- Peel the backing from a sheet of contact paper and place the dark border on the sticky surface.
- Fill the center with colorful tissue-paper squares, overlapping some pieces to create new shades.
- Cover the design with a second sheet of contact paper.
- Trim around the border and place the finished heart on a window.
Extension: Create several smaller hearts and arrange them together across a windowpane.
26. Doily Butterflies
This project uses heart-shaped paper doilies to explore symmetry and balance by turning familiar shapes into butterfly wings.
Materials: White or pink paper heart doilies, wooden clothespins, markers, chenille pipe cleaners, and glue.
Step-by-Step Instructions:
- Color a wooden clothespin with markers to create the butterfly’s body.
- Fold each paper heart doily in half to create two matching wings.
- Glue the pointed ends of the folded doilies to the back of the clothespin so the wings fan out evenly.
- Twist a short piece of pipe cleaner around the top of the clothespin to create two antennae.
Extension: Clip the finished butterflies onto a string to create a lightweight garland.
27. Egg Carton Hearts
This upcycling-style project shows children how molded-pulp packaging can become a three-dimensional art piece.
Materials: New molded-pulp craft cups or unused cardboard egg-carton-style packaging, washable tempera paint, paintbrushes, tacky craft glue, scissors, and sturdy backing cardboard.
Step-by-Step Instructions:
- Cut the individual cups from a clean cardboard egg carton. An adult should help with thick cardboard.
- Trim the edges so each cup sits flat.
- Paint the cups in bright Valentine’s Day colors and let them dry.
- Arrange the cups in a heart pattern on the backing cardboard.
- Glue each cup in place and let the project dry completely.
Extension: For children who no longer put objects in their mouths, turn the cups into a counting game with large counters or other age-appropriate items.
28. Citrus Peel Roses
This adult-assisted craft uses citrus peel to create a fragrant decoration that may last for several weeks if it is dried thoroughly and kept away from moisture.
Materials: Fresh oranges or grapefruits, a paring knife for adult use only, toothpicks, and strong clear thread or fishing line.
Step-by-Step Instructions:
- An adult should cut a continuous strip of peel approximately 1 inch wide from the fruit.
- Show the child how to roll the peel tightly into a rose shape, starting at one end.
- An adult should secure the base with a toothpick.
- Place the rose in a dry, well-ventilated area until the peel is almost firm.
- Before the peel becomes completely hard, have an adult remove the toothpick and pass strong thread through the existing hole.
- Allow the roses to finish drying before hanging the garland.
Extension: Arrange the dried citrus roses in a decorative bowl with cinnamon sticks and whole cloves. Keep the mixture out of reach of young children and pets.
Valentine’s Day Games and Party Activities
29. Spot Hearts Scavenger Hunt
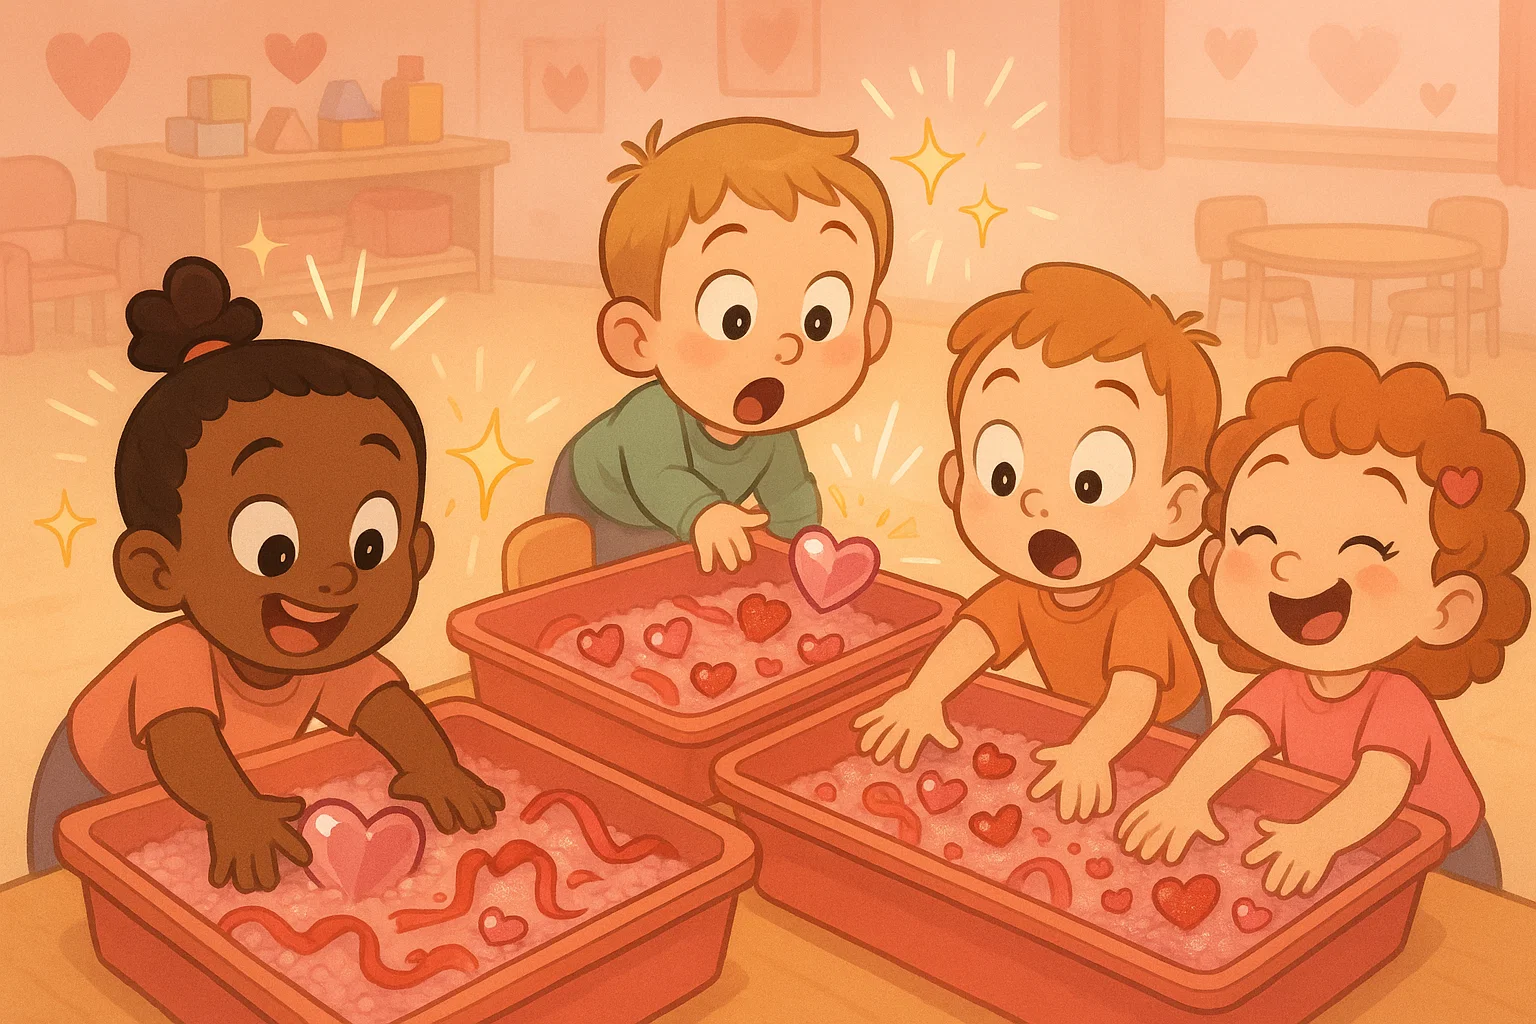
The Spot Hearts Scavenger Hunt keeps children moving while they practice counting and visual scanning.
Number of Participants: 2 to 20 players.
Duration: 15 to 30 minutes.
Required Materials: 10 to 20 colorful paper hearts numbered consecutively and a matching checklist for each player.
Rules:
- Hide the numbered hearts in safe, accessible places before the game begins.
- Leave part of each heart visible for younger children if needed.
- Give each child a checklist to track the numbers they find.
- Ask players to look for the hearts and check off each number without moving the paper shapes.
- End the game when everyone has found all the numbers, or set a time limit and review the remaining locations together.
30. I Love You Scavenger Hunt
This collaborative scavenger hunt focuses on emotional literacy by encouraging children to share memories and expressions of appreciation.
Number of Participants: One child or a small family group.
Duration: 20 to 45 minutes.
Required Materials: Written clue cards and one small box or envelope for the final surprise.
Rules:
- Hide a series of clue cards around the house, with each card referring to a familiar place, family memory, or shared activity.
- Read the first clue aloud to guide the children to the next location.
- At each stop, invite the children to answer a short positive prompt before collecting the next clue.
- Allow children to pass if they do not want to answer a personal question.
- Lead the players to a final shared activity, book, or set of appreciation notes.
31. Cupid Says
Cupid Says is a movement game that practices listening, attention, and self-control.
Number of Participants: 3 to 30 players.
Duration: 10 to 15 minutes.
Required Materials: None.
Rules:
- Choose an adult or group leader to play Cupid.
- The leader gives movement commands, but players should follow them only when the phrase begins with “Cupid says,” as in “Cupid says, blow a kiss.”
- If a player follows a command that does not begin with “Cupid says,” they freeze for a moment and rejoin on the next command.
- Keep the pace lively, but choose movements that are safe for the available space.
32. Roll and Cover Heart Game
This math game develops early numeracy skills such as subitizing and addition by combining dice rolls with visual tracking.
Number of Participants: 1 to 4 players.
Duration: 10 to 20 minutes.
Required Materials: Printed game boards with hearts numbered 2 through 12, two standard dice, and large reusable counters.
Rules:
- Give each participant a game board and a set of counters.
- Take turns rolling two dice and adding the numbers.
- Find the matching sum on the game board and cover it with a counter.
- If the matching heart is already covered, the player’s turn ends without placing another counter.
- The first player to cover six different hearts wins, or the player with the most covered hearts after 10 rounds wins.
33. Musical Hearts
Musical Hearts combines movement with simple conversation prompts and gives children a chance to practice speaking and listening in a group.
Number of Participants: 4 to 25 players.
Duration: About 15 minutes.
Required Materials: Large numbered paper or foam hearts, an audio player, and a list of light, positive prompts.
Rules:
- Secure one heart for each child to the floor with painter’s tape, leaving enough space between the hearts for safe movement.
- Play music and ask the children to walk or dance around the outside of the circle.
- Pause the music at intervals and ask everyone to move safely to the nearest heart without running or pushing.
- Call out a number and invite the child standing beside that heart to answer a question such as “What is your favorite book?” or “What always makes you smile?”
- Allow any child to pass or answer with help from the group.
34. Love Game
The Love Game focuses on social-emotional learning and gives children practice with verbal expression, empathy, and active listening without competitive pressure.
Number of Participants: 2 to 8 players.
Duration: About 20 minutes.
Required Materials: A deck of age-appropriate prompt cards about feelings, support, and appreciation.
Rules:
- Sit in a comfortable circle and place the cards face down in the center.
- Take turns drawing a card and reading the prompt aloud.
- Let each player share as much or as little as they wish, and allow anyone to pass.
- Continue around the circle so everyone who wishes to participate has an opportunity to speak and listen.
35. Valentine’s Day Tea Party
This pretend-play or real tea party helps children practice turn-taking, conversation, and simple hosting skills.
Number of Participants: 2 to 6 players.
Duration: 30 to 60 minutes.
Required Materials: A toy tea set for pretend play or food-safe cups and dishes for real snacks, plus paper invitations and a tablecloth.
Rules:
- Have children write and deliver paper invitations to family members or friends.
- Set the table together with a clean tablecloth and the appropriate tea set or dishes.
- Practice simple table manners, such as taking turns, offering food to others, and using “please” and “thank you.”
- Serve cold or lukewarm drinks rather than hot tea.
- Check all snacks for allergens and choking hazards before serving them.
- Use the time to share stories and talk together.
36. Heart Toss Game
The Heart Toss Game develops gross motor skills and hand-eye coordination by asking children to judge distance and control their throwing strength.
Number of Participants: 1 to 6 players.
Duration: About 15 minutes.
Required Materials: Three open bins or buckets decorated with hearts, soft beanbags, and tape for marking a starting line.
Rules:
- Place the target buckets side by side or stagger them at different distances from the starting line.
- Assign different point values based on distance, such as 5, 10, and 15 points.
- Give each player three beanbags to toss from behind the line.
- Add the points from successful throws.
- Let players try again to improve their personal scores rather than eliminating anyone.
Valentine’s Day STEM and Learning Activities
37. Floating Dry-Erase Hearts Experiment
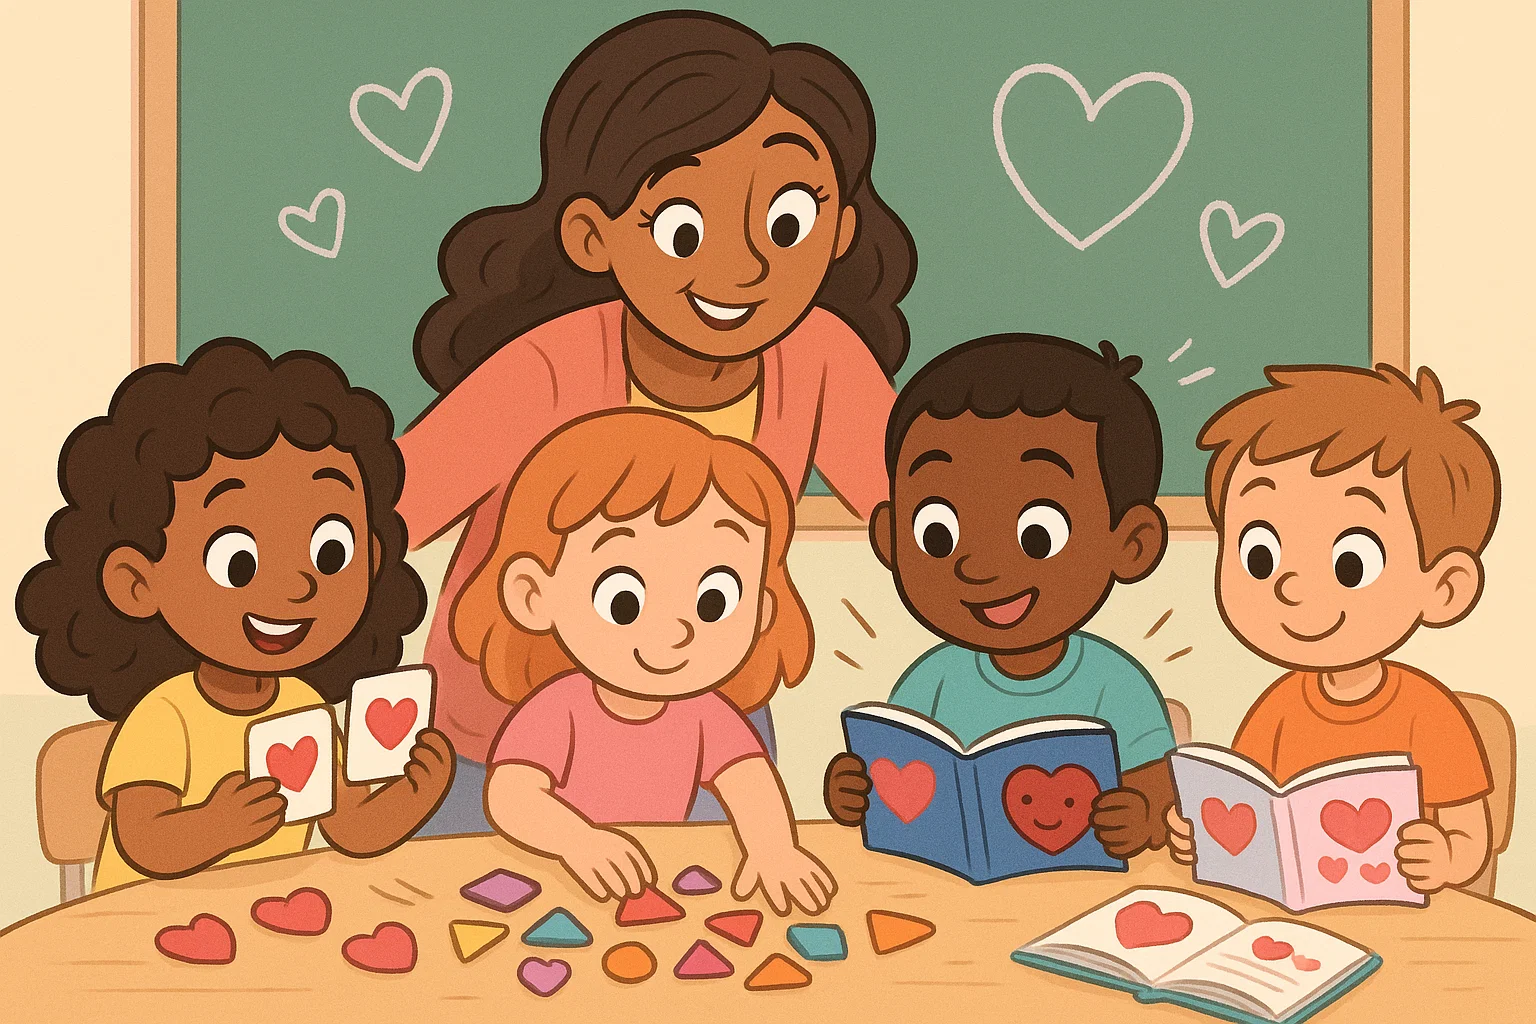
This simple science activity explores adhesion, surface properties, and buoyancy by showing how a dry-erase drawing can detach and float on water.
Prediction: If water is poured onto a dry-erase drawing on a smooth, nonporous surface, the drawing may detach and float because the dried ink adheres only weakly to the surface.
Materials: A smooth ceramic plate or glass tray reserved for craft activities, fresh dry-erase markers, and room-temperature water.
Step-by-Step Instructions:
- Draw a simple heart with thick, connected lines in the center of the smooth ceramic plate.
- Let the marker ink dry for about 60 seconds.
- Slowly pour water onto the plate from the edge so it reaches the drawing gradually.
- Watch to see whether the ink film lifts from the surface and floats. The shape may separate into pieces.
- Try again with a thicker line or a different smooth plate if the first drawing does not lift.
Scientific Explanation: Dry-erase ink contains a solvent that evaporates and a silicone-based polymer that acts as a release agent, preventing the dried ink film from bonding strongly to a smooth, nonporous surface. When water reaches the edge of the drawing, it can slip underneath and lift the film. The detached film can then float because it is less dense than water.
38. Heart Building Challenge
This engineering challenge asks children to build a stable structure from lightweight materials.
Prediction: A structure that uses triangular sections and a wide base will resist bending and tipping better than one built only from unsupported squares.
Materials: Wooden toothpicks, miniature marshmallows or soft clay balls, a lightweight test object, and a small ruler.
Step-by-Step Instructions:
- Show the child how to connect toothpicks with marshmallows or clay balls to create triangles and squares.
- Challenge the child to combine the shapes into a three-dimensional tower.
- Ask the child to build a heart outline near the top without making the structure fall.
- Test whether the tower can support a lightweight object.
- Measure the completed tower and compare different designs.
Scientific Explanation: The activity demonstrates how compression and tension move through a frame. Triangular sections help the frame hold its shape, while a wider base makes the structure less likely to tip.
Safety Note: This activity is intended for older children with close adult supervision. Toothpicks are sharp, and the small connectors may be choking hazards. Do not eat materials that have been handled during construction.
39. Secret Message Science
This chemistry experiment shows how heat causes the organic compounds in lemon juice to darken before the surrounding paper.
Prediction: Marks made with lemon juice will turn brown when heated because the treated areas break down and oxidize faster than the untreated paper.
Materials: Fresh lemon juice, cotton swabs, heavy white paper, and a hairdryer or warm iron operated by an adult.
Step-by-Step Instructions:
- Dip a clean cotton swab into lemon juice and write a message or draw a heart on the paper.
- Let the liquid dry completely until the marks are difficult to see.
- An adult should warm the paper gradually with a hairdryer or press it briefly with a warm, no-steam iron.
- Keep the paper away from open flames and check it frequently to prevent scorching.
- Watch as the hidden message gradually turns light brown against the paper.
Scientific Explanation: Lemon juice contains organic compounds that dry nearly clear on paper. Heating speeds up their breakdown and oxidation, causing the treated areas to brown before the surrounding paper and revealing the message.
40. Heart Symmetry Painting
This art-and-math activity introduces reflection and line symmetry by showing how wet paint transfers across a fold.
Prediction: Folding the paper along its center crease will transfer the wet paint and create a roughly mirrored pattern on the opposite side.
Materials: Heavy drawing paper and liquid tempera paint in squeeze bottles.
Step-by-Step Instructions:
- Fold a sheet of heavy drawing paper in half, then unfold it to create a clear center crease.
- Squeeze small dots or short lines of paint in the shape of half a heart along one side of the crease.
- Fold the paper along the crease and press gently to spread the paint.
- Carefully open the paper to reveal a mirrored, approximately symmetrical heart pattern.
- Let the painting dry flat.
Scientific Explanation: This project demonstrates reflection across a central line. When the folded sides touch, wet paint transfers to the opposite side and creates a similar shape at approximately the same distance from the crease.
Supplies, Prep, and Safety Tips
Basic Craft Supplies
Gathering core materials in advance can reduce setup time and make it easier to move from one activity to another.
- Paper and Structural Materials: Heavy cardstock, construction paper, paper plates, paper doilies, cardboard tubes, poster board, and corrugated cardboard.
- Adhesives and Cutting Tools: Non-toxic school glue, glue sticks, tacky craft glue, clear contact paper, painter’s tape, safety scissors, and adult-use cutting tools.
- Coloring and Painting Materials: Washable tempera paint, liquid watercolors, wax crayons, markers, washable ink pads, and non-toxic water-based paint.
- Sensory and Three-Dimensional Materials: Yarn, twine, fabric scraps, large pom-poms, foam hearts, dot stickers, clay, tissue paper, and large counters.
Food Allergy Checks
When serving snacks or using edible materials, check every ingredient label, ask about diagnosed food allergies, and follow the allergy and food-safety policies of the school or group.
- Peanut and Nut Substitutions: Use only an alternative that has been confirmed as safe for every participant. Check labels for soy, seed, tree-nut, peanut, and cross-contact warnings.
- Dairy and Egg Alternatives: Choose products that match the participants’ specific needs, because plant-based milks and egg substitutes may contain soy, tree nuts, or other allergens.
- Gelatin and Food Colorings: Check product labels and individual allergy requirements before choosing gelatin alternatives or food colorings. Natural ingredients can also cause reactions.
- Cross-Contact Prevention: Use clean utensils, preparation surfaces, and serving containers. Do not share tools between allergen-free and other foods.
Adult Supervision Points
- Sharp Tools: Adults must handle utility knives, paring knives, wire cutters, awls, and other sharp tools used to prepare materials.
- Heating Elements: Adults must control irons, hairdryers, and ovens. Keep children away from hot surfaces and heated materials.
- Choking and Ingestion Hazards: Keep small craft pieces out of reach of children who may put objects in their mouths. Do not use loose magnets in children’s crafts.
- Food and Craft Separation: Do not eat craft materials, including marshmallows or dough that have been handled during an activity.
- Individual Needs: Adjust activities for allergies, sensory sensitivities, mobility needs, and developmental level.
Cleanup and Storage Tips
- Protective Layers: Cover the table with a washable tablecloth and place especially messy projects on shallow trays to contain paint, water, and glue.
- Pre-Sorted Kits: Arrange materials in labeled trays, cups, or reusable containers before the activity begins.
- Scrap Management: Keep separate containers for clean recyclable paper and for scraps covered with paint, glue, tape, or other non-recyclable materials.
- Storage Solutions: Store leftover yarn, stickers, paper, and other reusable supplies in clear labeled bins.
- Tool Storage: Return sharp tools, hot appliances, and small parts to secure adult-only storage immediately after use.
Valentine’s Day Activities for Kids: FAQ
What are the best Valentine’s Day activities to do at home with the kids?
The best Valentine’s Day activities are easy to adapt to your children’s ages, interests, and attention spans. Simple options include making homemade valentines, creating a family appreciation poster, organizing a heart-themed scavenger hunt, or playing Valentine’s games such as Cupid Says. These activities require only basic materials and give family members and friends a fun way to celebrate love together.
Which Valentine’s activities are suitable for little ones?
For little ones, choose activities with large, easy-to-hold materials and only a few simple steps. Textured Heart Painting, the Heart Tracing Activity, and a simplified Family Valentine Poster are good crafts for toddlers. These Valentine’s activities can help your child practice fine motor skills, hand control, and creative expression. Avoid small decorations, sharp tools, and other materials that may create a choking or injury risk.
What are some low-mess Valentine craft ideas?
Low-mess craft ideas include the Washi Tape Heart Suncatcher, Heart Tracing Activity, Stuffed Heart Valentine, and Simple Heart Card. A suncatcher craft made with contact paper and translucent tape is especially useful when you want a colorful project without liquid paint. Pre-cut shapes, stickers, and card templates can also make Valentine’s Day crafts and activities easier to organize.
How can children make homemade valentines more personal?
Children can personalise homemade valentines by adding the recipient’s name, writing a specific message of appreciation, or including a drawing based on a shared memory. A DIY Valentine can also become a handmade gift when children add a woven pocket, a small keepsake, or a decorative yarn heart. Encourage them to focus on the person receiving the card rather than trying to make every design look perfect.
Take a short quiz to find out what your everyday choices say about your parenting style
When your child is curious about something new, what’s your instinct?
Take a short quiz to find out what your everyday choices say about your parenting style
“Can I download this app?” What happens next?
Take a short quiz to find out what your everyday choices say about your parenting style
When it comes to rules at home, which sounds most like you?
Take a short quiz to find out what your everyday choices say about your parenting style
If you could give your child one life skill today, what would you pick?
Take a short quiz to find out what your everyday choices say about your parenting style
Your child gets to choose what to watch. What would your ideal setup look like?
Take a short quiz to find out what your everyday choices say about your parenting style
Pick your parenting superpower ✨